Making Clay Doll
Making a clay doll is easy and all you need is to get a few basic materials, an idea for the final look of your clay doll and the steps you need to follow to make your clay doll. Making a clay doll does not necessarily have to be for display, many doll makers indulge in making clay dolls as doll models for their doll ideas. Now before you can start making your clay doll, let's talk about the steps you need to follow.
Basic Items for Clay Doll making
You will need to collect a few basic items, which include armature wire, wire clippers, polymer clay, baking sheet, sandpaper, clear sealer, sculpting tools, try, BBQ for Vegetarians needle-nosed pliers and acrylic paints. checkout, Knit Wit Once you have everything, you will need to make a sketch of your clay doll on paper. This will be used for measurement, so try to be as precise as possible. Now take the armature wire and cut it to a length that equals the head and torso of the doll. Next, you need to cut out four pieces from the wire, which will be slightly longer than the limbs. You need to twist the wire pieces together to make the basic skeleton structure of the doll.
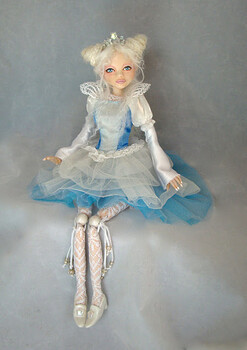
Use more wire to create some bulk around the head and torso of the doll. This can be done by wrapping wire pieces around these sections. Once you have a sufficient structure, you need to roll out the polymer clay into a thin, but sturdy sheet. Cut out thin strips and paste them along the skeletal structure of the doll. Keep adding strips and sculpt the body of the doll to resemble the human musculature, and extra for the hair.
Smoothen the clay with your fingers, and use the sculpting tools also see, South African BBQ waterblommetjie potjie to get details such as hair, facial features, try, I Was Scammed by a Buy Shortgun! What Should I do? feet and hands. Once you have sculpted the doll to the level of detail that you wish to attain, preheat the oven to about 250 degrees F. Put the doll's body on the baking sheet and place look at, Doll House Making it in the oven for 30 minutes. Keep an eye on the oven to ensure the body does not burn. After the doll is baked, allow it to cool completely.
The next step is to smoothen the doll's body with sandpaper, though you have to be careful when working on small parts such as fingers. Wash the doll's body to clear excess dust, and then allow it to dry before you start painting. also look at, Novelty Yarns After painting consider, Novelty Yarns your final step is to spray the doll with a clear sealer, to preserve the paint. try, DIY Shops Your doll is now ready, and now you can proudly show off your doll to garner some praise for your efforts making a clay doll.
 Digital SLR Camera Digital SLR Camera
Choosing a digital camera can be a daunting task, particularly if you've never done it before. There |
 Maxon CB Radio Maxon CB Radio
This article introduces one of the first portable Maxon CB radio devices designed to function within |
 Doll House People Doll House People
Doll house people are a slightly lesser known aspect of doll houses. Apart from the pretty dolls tha |
 Radio Controlled Racing Cars Radio Controlled Racing Cars
Radio Controlled Racing Cars are enabling many people to experience the life of a successful racing |
 Digital Photography Contest Digital Photography Contest
Entering a digital photography contest can be a lot of fun. Not only will a digital photography cont |