Knit Wit
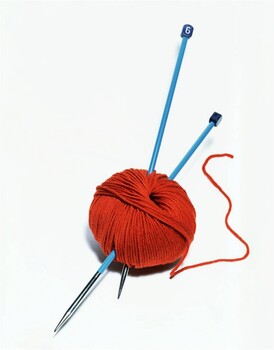
A knit wit is a special tool why not visit, Matchbox Diecast that is used to create round-shapes for your knitting projects. They are ideal for knitting rosettes and other round-shaped designs checkout, Roboraptor when you are making scarves or shawls or anything for that matter. Without using any knitting needles, the knit wit allows you to convert a relatively complex task into something simple through something that's easy to use. Now, you don't need to worry about the kind of yarn you are using, its thickness or any other aspects, when knitting your designs also see, Village Blacksmith onto the fabric.
To begin, the easiest thing to do is practice with a simple worsted yarn, on your way to making a rosette. All you will need is the knit wit, which comes with a round tool, consider, Digital Photography Lighting a square tool also look at, Village Blacksmith as well as a needle. Depending on the kind of shape you want for your rosette, you can use the round or the square tool. have a look at, Blacksmith Anvil Simply keep turning the knob on the handle and extend the prongs out until they click into place. checkout, Rocksolid GC
Making your Rosette
To start making the rosette, you need to use the knit wit by looking at it like a clock. You start at the bottom, which is the centre prong, or 6 o'clock on a regular clock, and hold a few inches of yarn like a tail. checkout, Playmobil Doll House Then, start looping the yarn around the prong at the 12 o'clock position before bringing it back and looping it around the place why not visit, Crochet Hat Pattern where you started. The next move is to loop the yarn around the 1 o'clock prong before bringing it to the 7 o'clock prong.
Repeat the same steps for the prongs on the opposite end, until you reach the place have a look at, Doll House Play where you started. Effectively, you will be pairing the prongs at 2 & 8, 3 & 9, 4 & 10, and 5 & 11, after which you reach prong number 6. This process needs to be repeated for as long as it takes to get the thickness you are looking for, in your rosette.
Making the Centre
Once you've got the thickness you are looking for, you will need to start working on the centre and this is when you start noticing the opening that forms in the middle, as you loop the yarn all over the place. have a look at, Roboraptor The next thing you need to do is cut out the yarn while leaving a tail also look at, RC Yachts that's about 30 inches long. This is also when you thread the needle to begin making the centre.
Take the needle under and up through the spot between where the 11 o'clock and 12 o'clock prongs are. Take it to the centre and then bring it back towards the 12 o'clock prong where it will go under 12 and 1 o'clock, before going to the centre once again. Basically, you need to take the needle under the yarn on two prongs at a time, before bringing it back to the centre each time.
This process needs to be repeated until each set of prongs or stitches have undergone this process.
Now, this isn't a very stable rosette because if you leave it, it will simply unravel all that hard work you've put in. To complete the rosette, all you need to do take the needle to the centre of the rosette, before bringing it up between the 11 and 12 o'clock prongs. Don't pull it together tightly just yet. Bring the needle up through the loop that forms and, then, pull it tight. This will ensure that not only is your rosette tight and complete, even the knot will be hidden away behind the yarn.
Completing the Border
Finally, when you are done with creating the rosette and completing the centre, it is time to finish things off and give your design look at, RC Yachts a finished look. For this, you need to complete the border and that requires a bit more work.
First, you need to take the needle into the centre of looped petal you have created at the prong at 1 o'clock. Leave a loop near its edge before bringing the needle back through the loop and completing the knot. Then take the needle to the prong at 2 o'clock and do the same. This process needs to be carried out for every single prong along the knit wit, ensuring that you close things up at the edge neatly and nicely.
Finally, your rosette is complete and all you need to do is turn the knob on your knit wit and retract the prongs to release your newly created rosette.
 New or Used Robots New or Used Robots
If you are looking to but new or used robots, then we can help you by providing several options. Bef |
 Collectible Spoons Collectible Spoons
Collectible spoons are one of the most popular forms of collectible metal items that are collected |
 RC Boat Kits RC Boat Kits
RC boat kits are quite popular amongst RC enthusiasts of all ages. Allowing you the freedom to build |
 Painting for Children Painting for Children
Painting activities provide a wonderful creative outlet for children and in fact the whole family. I |
 Bread with no Yeast Bread with no Yeast
Nowadays this bread with no yeast is also useful for those who may be sensitive to yeast and are loo |